Are you ready to transform your garden into a buzzing paradise? Making a mason bee house is easier than you might think, and it offers incredible benefits for your garden’s ecosystem.
Imagine your flowers bursting with color and your fruits and vegetables thriving, all thanks to these diligent little pollinators. By creating a welcoming home for mason bees, you’re not only helping nature but also boosting your garden’s productivity. In this guide, you’ll discover step-by-step instructions that make the process simple and enjoyable.
You don’t need fancy tools or materials—just a bit of creativity and a desire to see your garden flourish. Ready to dive in and learn how to make a mason bee house that will attract these beneficial insects to your backyard? Let’s get started!

Materials Needed
Creating a mason bee house is a fulfilling project. It supports local ecosystems and encourages pollination. Understanding the materials needed is crucial. Proper materials ensure the bees' safety and comfort.
Wooden Blocks
Wooden blocks form the core structure. Use untreated, natural wood for safety. Pine or cedar are excellent choices. These woods resist rot and weather damage.
Drill And Drill Bits
A drill is essential for making holes. Use drill bits of varying sizes. Ideal hole diameters range from 5/16 to 3/8 inches. Ensure holes are 6 inches deep.
Paper Straws Or Tubes
Paper straws or tubes provide nesting spaces. Avoid plastic or metal straws. They must be breathable and biodegradable. Secure them tightly within the wooden blocks.
Sandpaper
Sandpaper smooths rough edges. It prevents splinters that harm bees. Fine-grit sandpaper is recommended. Smooth surfaces encourage bees to settle.
Weatherproof Sealant
Sealant protects the wood from elements. Choose a bee-safe, non-toxic option. Apply a thin layer over the exterior. Ensure it dries completely before use.
Mounting Hardware
Mounting hardware secures the bee house. Hooks or brackets work well. Place the house on a stable surface. Ensure it's easily accessible for bees.
Choosing The Right Location
Finding the perfect spot for your mason bee house is crucial. Seek sunny areas sheltered from heavy winds. Ensure a nearby pollen source for thriving bee activity.
Choosing the right location for your mason bee house is crucial for attracting these beneficial pollinators. While mason bees are not particularly picky, placing their house in an optimal spot can significantly enhance their productivity and survival. Let’s explore some key factors to consider when selecting the perfect location.
Sunny Spots Are Essential
Mason bees thrive in sunny areas. Position your bee house where it can receive morning sun. This warmth helps the bees become active earlier in the day, maximizing their pollination efficiency. Avoid shaded areas, as they can keep the bees dormant longer and reduce their working hours.
Avoid Windy Locations
Wind can be a significant challenge for mason bees. Choose a spot that is sheltered from strong winds to prevent the bee house from swaying. This stability is important for the bees to safely enter and exit their home. A quiet, calm environment encourages more bees to take residence.
Proximity To Nectar And Water Sources
Ensure your mason bee house is near abundant flowers. This proximity provides easy access to nectar and pollen. Also, a nearby water source is beneficial, as bees need water to mix with pollen and nectar to feed their larvae. If your garden lacks a water feature, consider placing a shallow dish of water nearby.
Height Matters
Mount your mason bee house at a height of around 3 to 6 feet. This height is ideal for easy access while keeping them safe from ground predators. You can attach it to a post, fence, or even a tree, ensuring it’s secure and stable.
Consider Human Activity
Think about how much traffic passes through the area. Mason bees are gentle and unlikely to sting, but it's wise to avoid placing their house in a spot with high human activity. A tranquil corner of your garden can be the perfect home for them. Choosing the right location for your mason bee house can make a significant difference. Have you ever thought about how such small changes can impact your garden's ecosystem? By making thoughtful decisions, you not only enhance your garden but also support these vital pollinators.
Building The Frame
Crafting a mason bee house starts with building the frame using untreated wood. Cut pieces to create a rectangular shape, ensuring sturdy corners for support. Ensure the frame has open spaces for air circulation, promoting a healthy environment for the bees to thrive.
Building a mason bee house is a fulfilling project that not only benefits your garden but also supports local bee populations. One essential step in this DIY endeavor is constructing the frame. A well-built frame provides stability and protection for the bees, ensuring they have a safe place to nest. Let's dive into the process and make sure your bee house stands the test of time.
Choosing The Right Materials
Select untreated wood for a durable and bee-friendly frame. Cedar and pine are popular choices due to their resistance to weathering. Avoid pressure-treated wood as it contains chemicals that can harm bees.
Cutting The Wood
Measure and cut your wood pieces to the desired size. A typical mason bee house is about 8 inches tall, 6 inches wide, and 6 inches deep. Use a saw for clean cuts, ensuring each piece fits together snugly.
Assembling The Frame
Lay out the cut pieces to form a rectangular box. Secure them with screws or nails, making sure the frame is sturdy. Consider using corner brackets for extra stability, especially if you live in a windy area.
Adding A Roof
The roof should extend slightly over the frame to protect it from rain. Cut a piece of wood wider than the frame's width and attach it at a slight angle. This helps water run off, keeping the interior dry.
Ensuring Proper Ventilation
Drill small holes in the sides of the frame for airflow. Proper ventilation prevents mold and keeps the bee house dry. Be cautious with the hole size; they should be small enough to prevent predators from entering.
Finishing Touches
Sand down any rough edges to prevent splinters. You might want to add a non-toxic finish for a polished look. Ensure all elements are secure, as a wobbly frame can deter bees from settling in. Crafting a mason bee house frame is not just about assembling wood; it's about creating a welcoming home for your buzzing guests. Have you ever noticed how a simple project can transform your garden into a thriving ecosystem? As you build, remember that each choice, from material to design, impacts the bees' comfort and safety. So, what's stopping you from starting your bee-friendly journey today?
Creating Nesting Holes
Creating nesting holes for mason bees is a delightful endeavor that invites nature into your backyard. These industrious pollinators help enrich your garden, and providing them with a cozy home is a rewarding project. Whether you're a seasoned gardener or a curious beginner, building a mason bee house is simpler than you might think. Let's dive into selecting the right materials and dimensions for your nesting holes.
Selecting The Tube Material
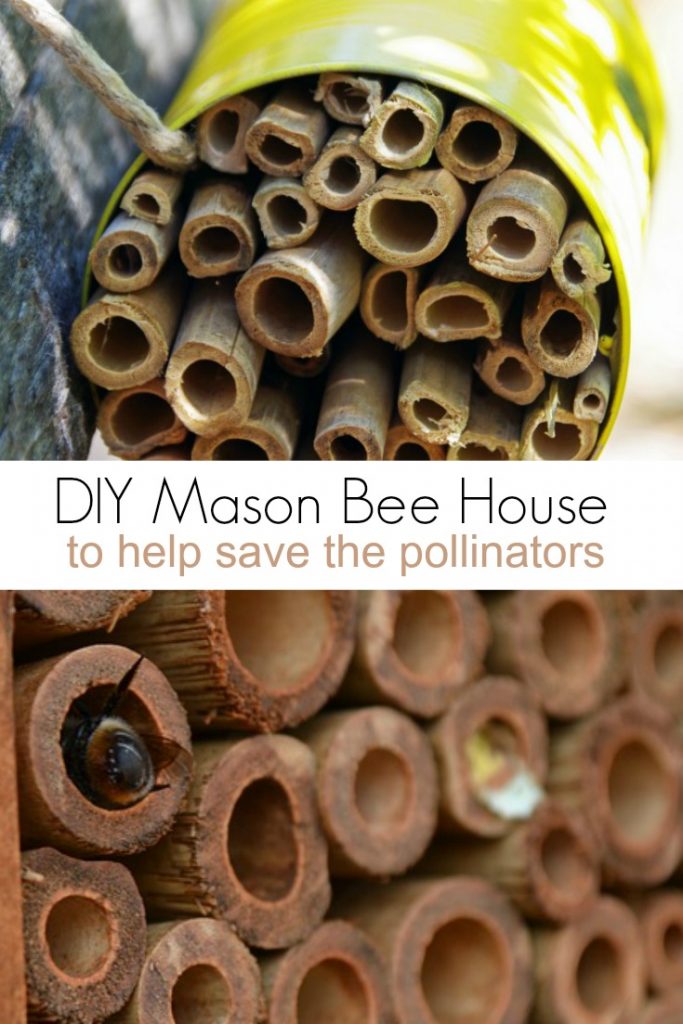
The material of your nesting tubes is crucial to the success of your mason bee house. You want something that mimics natural conditions. Bamboo, paper, or cardboard tubes are popular choices. Each material offers different benefits.
Bamboo tubes are durable and withstand weather changes. Cardboard tubes are more eco-friendly and easier to replace. Paper tubes are flexible and can be customized to fit your specific needs. Think about what works best for your environment and budget.
Have you considered using natural reeds from your local area? They provide a great alternative and are often overlooked. Using locally sourced materials not only supports your region but also creates a more authentic habitat for the bees.
Ideal Tube Dimensions
Tube dimensions are vital for attracting mason bees. The ideal diameter ranges from 7 to 10 millimeters. This size accommodates the bees comfortably and encourages them to stay. You want your bees to feel at home, not cramped.
The length of the tubes should be around 6 inches. This gives the bees enough space to lay their eggs and store pollen. Too short, and the bees won't use them. Too long, and they might not reach the end.
Consider adding a variety of tube sizes. This caters to different species and increases the biodiversity in your garden. Have you ever wondered if you're missing out on attracting other beneficial insects? Mixing dimensions could be the solution.
Creating nesting holes for mason bees doesn't require special skills. With the right materials and dimensions, you can build a thriving bee sanctuary. As you watch your garden flourish, you'll find that this simple project offers immense satisfaction. What are you waiting for? Start crafting your bee house today and witness the magic of nature unfold!
Assembling The House
Crafting a mason bee house involves using wood or bamboo tubes for nesting. Arrange these tubes within a sturdy frame. Position the house in a sunny spot, protected from rain and wind, to attract these helpful pollinators.
Assembling a mason bee house is a rewarding and straightforward process that connects you with nature. It’s the heart of the project where your creativity and precision come together. With a few simple steps, you can provide a safe haven for these beneficial pollinators right in your backyard.
Understanding The Components
Before you start, gather your materials. You’ll need a wooden box or a block of wood, hollow reeds, or paper tubes. Ensure these components are untreated to avoid harming the bees. Understanding the components is crucial. The box acts as a shelter, while the tubes provide nesting spaces. Each element plays a vital role in attracting and housing mason bees.
Arranging The Tubes
Begin by placing the tubes tightly within the box. A snug fit is important; it prevents the tubes from falling out or shifting. Use a variety of tube sizes to accommodate different bee species. Consider using a mix of natural reeds and cardboard tubes. This diversity can attract more bees. Think about how you would feel if you had a variety of choices for your home!
Securing The Structure
Once the tubes are arranged, secure them. You can use a piece of wire mesh over the front. This keeps the tubes in place while allowing bees easy access. Ensure the mesh is wide enough for bees but small enough to deter predators. It’s like adding a security system to your bee house. Placement is key. Choose a sunny spot facing southeast. This warmth helps bees emerge early in the day, optimizing their foraging time. Avoid placing the bee house near bird feeders or busy areas. Consider how you would like a quiet, sunny spot if you were a bee.
Final Touches
Add a roof to protect from rain. A simple overhang made from a piece of wood can suffice. Check stability. A stable house ensures that your efforts in assembling are not wasted by a simple gust of wind. Reflect on your work. You’ve created a functional, inviting space for mason bees. Have you thought about the impact of these small creatures on your garden’s health? Your effort in assembling this house could lead to a flourishing garden.
Decorating And Finishing Touches
Decorating and adding finishing touches to your mason bee house can be fun. It not only enhances the appearance but also makes it more inviting. A well-decorated bee house can also blend beautifully with your garden. Let's explore some creative ways to decorate your bee house.
Paint The Exterior
Choose non-toxic paint for the bee house. Bright colors attract bees, but subtle tones blend well with nature. Ensure the paint is weather-resistant to last longer. Avoid painting the insides of the tubes or holes.
Add Natural Elements
Attach small branches or twigs around the bee house. Use dried leaves or moss for a natural touch. These elements make the house look like a part of the environment.
Use Decorative Patterns
Draw or stencil patterns on the bee house. Simple shapes or flowers work well. Ensure the designs are clear and visible.
Seal With A Protective Coating
Apply a sealant to protect the bee house from weather damage. Choose a non-toxic, environmentally friendly product. A sealant helps maintain the house’s look and longevity.
Attach A Hanging Hook
Fix a sturdy hook for easy hanging. Ensure it can support the house’s weight. This feature makes placement flexible and secure.
Personalize With Name Or Message
Add a name or message to personalize the bee house. Use waterproof markers or paint. Personal touches make the bee house unique and special.
Installing The Mason Bee House
Installing your mason bee house is a crucial step in ensuring the bees have a safe and productive environment. Positioning it correctly not only encourages bees to take up residence but also maximizes their pollination efforts. Let's dive into the specifics to make sure your bee house is perfectly installed.
Mounting Instructions
Mount the mason bee house at eye level, ideally around 3 to 5 feet off the ground. This height makes it easy for you to observe the bees while they work. Use a sturdy hook or nail to secure the house against a flat surface like a wall or a fence.
Choose a location that provides stability and prevents the house from swaying in the wind. A south or southeast-facing position is ideal because it receives the morning sun, warming the bees and encouraging early activity. Does your chosen spot meet these criteria?
Weather Considerations
Protection from rain and wind is vital. Ensure the house has an overhang or is placed under a sheltered area to keep the nesting tubes dry. Moisture can harm the larvae, and wind might disturb the bees' flight paths.
Temperature fluctuations can affect the bees' activity. If you live in an area with harsh weather conditions, consider installing windbreaks or thermal wraps. This simple adjustment can significantly improve the survival rate of your mason bees.
Reflect on your local climate. Are there specific weather challenges that might affect your bee house? Adapting to these conditions can make all the difference in creating a thriving habitat for your mason bees.
Maintaining The Bee House
Crafting a mason bee house involves assembling untreated wood pieces to form a small box. Drilling holes in the front allows bees to nest. Position the house facing southeast for morning sunlight, ensuring nearby flowers and mud for the bees.
Maintaining your mason bee house is essential for the health and productivity of your bee population. With proper care, you can ensure your bees thrive and continue to pollinate your garden effectively. Just like any other living space, a bee house requires regular maintenance to keep it clean and safe from predators. Here's how you can keep your bee house in top shape.
Cleaning The Tubes
Regular cleaning of the tubes is crucial. It helps prevent the buildup of debris and potential diseases. After the bees have finished nesting, gently remove the tubes from the house. Use a soft brush or pipe cleaner to clear out any remnants. If you notice mold or mildew, it’s time to replace those tubes. A clean tube invites healthy bees to nest again.
Checking For Predators
Predators can easily disrupt your bee house. Regular inspections can help you spot unwanted guests like ants or wasps. Look for signs of intrusion, such as chewed wood or disturbed nesting areas. If you find any, act quickly. Adding a mesh screen to your bee house entrance can be an effective deterrent. Have you ever considered how a small invader can impact your bee population? Keeping predators at bay ensures your bees can work efficiently. Your mason bee house is more than just a structure; it's a living ecosystem. With these simple maintenance steps, you can protect your bees and enjoy the fruits of their labor. Remember, a little effort goes a long way in fostering a healthy bee environment.
Attracting Mason Bees
Mason bees are gentle pollinators, perfect for gardens. Attracting them requires a cozy habitat. Creating a welcoming environment ensures these bees will thrive and help your plants flourish.
Providing Food Sources
Plant a variety of flowers to attract mason bees. Choose native flowers that bloom throughout the season. This provides constant food for the bees. Bees love nectar-rich plants like lavender and sunflowers. Avoid pesticides on these plants. Pesticides can harm bees and deter them from visiting. A diverse garden with blooming flowers supports bee health.
Enhancing Habitat
Build a sturdy mason bee house with natural materials. Use wood or reeds for the structure. Ensure each tube is smooth inside. Rough surfaces can damage bee wings. Position the house in a sunny location. Bees prefer warmth and sunlight. Protect the house from rain and strong wind. Secure it at a height of four to six feet. This height is optimal for bee access. Keep the surrounding area free of clutter. Bees need clear pathways to the house. Regularly check and clean the bee house. Cleanliness prevents pests and diseases.

Frequently Asked Questions
How To Build A Simple Mason Bee House?
To build a mason bee house, use a wooden block with drilled holes, 5/16 inch in diameter. Ensure holes are 6 inches deep. Position the house in a sunny spot, facing southeast. Provide a protective roof to shield from rain.
Secure it at least 3 feet above ground.
How Deep Do Mason Bee Houses Need To Be?
Mason bee houses should be 5 to 6 inches deep. This depth provides optimal nesting space for the bees. Ensure the tubes or holes are clean and dry to attract mason bees effectively. Proper depth helps support their natural behavior and enhances pollination in gardens.
What Is The Best Wood For A Mason Bee House?
Cedar and pine are ideal woods for a mason bee house. These woods resist rot and provide insulation. Avoid treated or painted wood, as chemicals can harm bees. Opt for natural, sustainable options to ensure a safe environment for the bees.
What Do You Do With A Mason Bee House In The Winter?
Store the mason bee house in a dry, unheated garage or shed during winter. Protect it from predators and moisture. Ensure proper ventilation to prevent mold. Check for any damage and clean the house before spring. This helps preserve bee cocoons and prepares them for the next season.
Conclusion
Crafting a mason bee house can be simple and rewarding. These bees help pollinate gardens and boost plant growth. By building a safe home, you support local ecosystems. Remember, use natural materials and ensure proper ventilation. Place the bee house in a sunny spot, away from strong winds.
Check it regularly to ensure it's clean and inviting. With your new bee house, enjoy watching these busy pollinators at work. Your garden will thank you with vibrant blooms and healthy plants. Happy gardening!