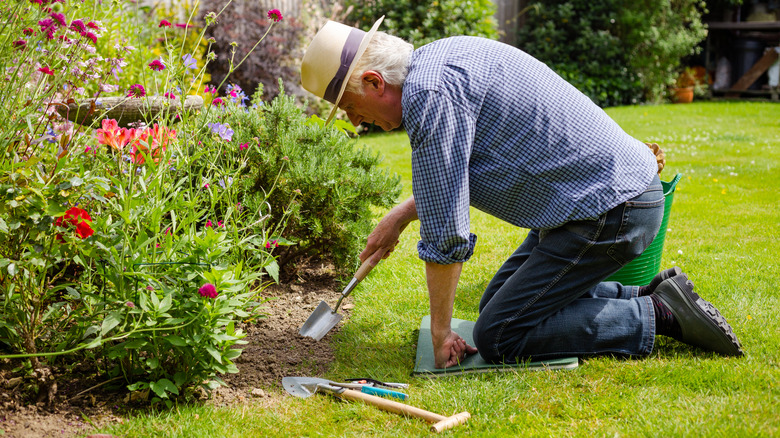
Do your knees ache every time you work in your garden? You're not alone.
Gardening is a labor of love, but it can be tough on your joints, especially if you're spending hours on the ground planting, weeding, or pruning. That's where a garden kneeling pad comes in. Imagine having a soft, comfortable cushion to protect your knees from the hard, unforgiving ground.
Sounds like a dream, right? But here's the exciting part: you can make one yourself! Not only will it save you money, but it also lets you personalize it to fit your style and needs. Intrigued? Let's dive into the simple steps to create your very own garden kneeling pad, transforming your gardening experience from painful to pleasurable. Keep reading to learn how you can enjoy your garden without the discomfort!
Credit: www.housedigest.com
Materials Needed
Gather foam, fabric, scissors, and adhesive. Select durable materials for comfort and longevity. Ensure all items are accessible.
When crafting your own garden kneeling pad, the right materials can make all the difference between a comfortable gardening experience and a painful one. This section will guide you through the essentials needed to create a garden kneeling pad that is both durable and comfortable. From choosing the perfect foam to selecting the right fabric, each element plays a critical role in achieving the perfect kneeling pad.
Essential Supplies
- Foam:You need foam to provide cushioning for your knees. It should be thick enough to offer comfort but not too bulky.
- Fabric:Select a durable fabric that can withstand outdoor conditions and is easy to clean.
- Scissors:You'll need sharp scissors to cut both the foam and fabric to the desired size.
- Measuring Tape:Accurate measurements ensure your kneeling pad fits your needs.
- Fabric Glue or Sewing Machine:These tools will help attach the fabric to the foam securely.
Choosing The Right Foam
Choosing the right foam is crucial for comfort. Consider using memory foam or high-density foam for maximum support. Memory foam molds to your knees, offering personalized comfort. High-density foam is durable and holds its shape well, ideal for frequent gardeners. Think about how much time you spend gardening, and choose foam thickness accordingly. Would a softer foam suit your needs, or do you prefer firm support? This choice can significantly impact your gardening experience.
Fabric Selection
Fabric selection is more than just color preference. Opt for waterproof fabric to protect against rain or spills. Consider fabrics like canvas or nylon, which are durable and easy to clean. Patterns or solid colors can make your kneeling pad visually appealing. Do you want a fabric that blends with your garden, or one that stands out? Ensure the fabric is breathable to prevent moisture buildup. This helps keep your pad fresh and long-lasting, even after hours of kneeling. Crafting a garden kneeling pad tailored to your needs isn't just practical; it's a reflection of your personal style and comfort.

Credit: www.amazon.co.za
Designing Your Kneeling Pad
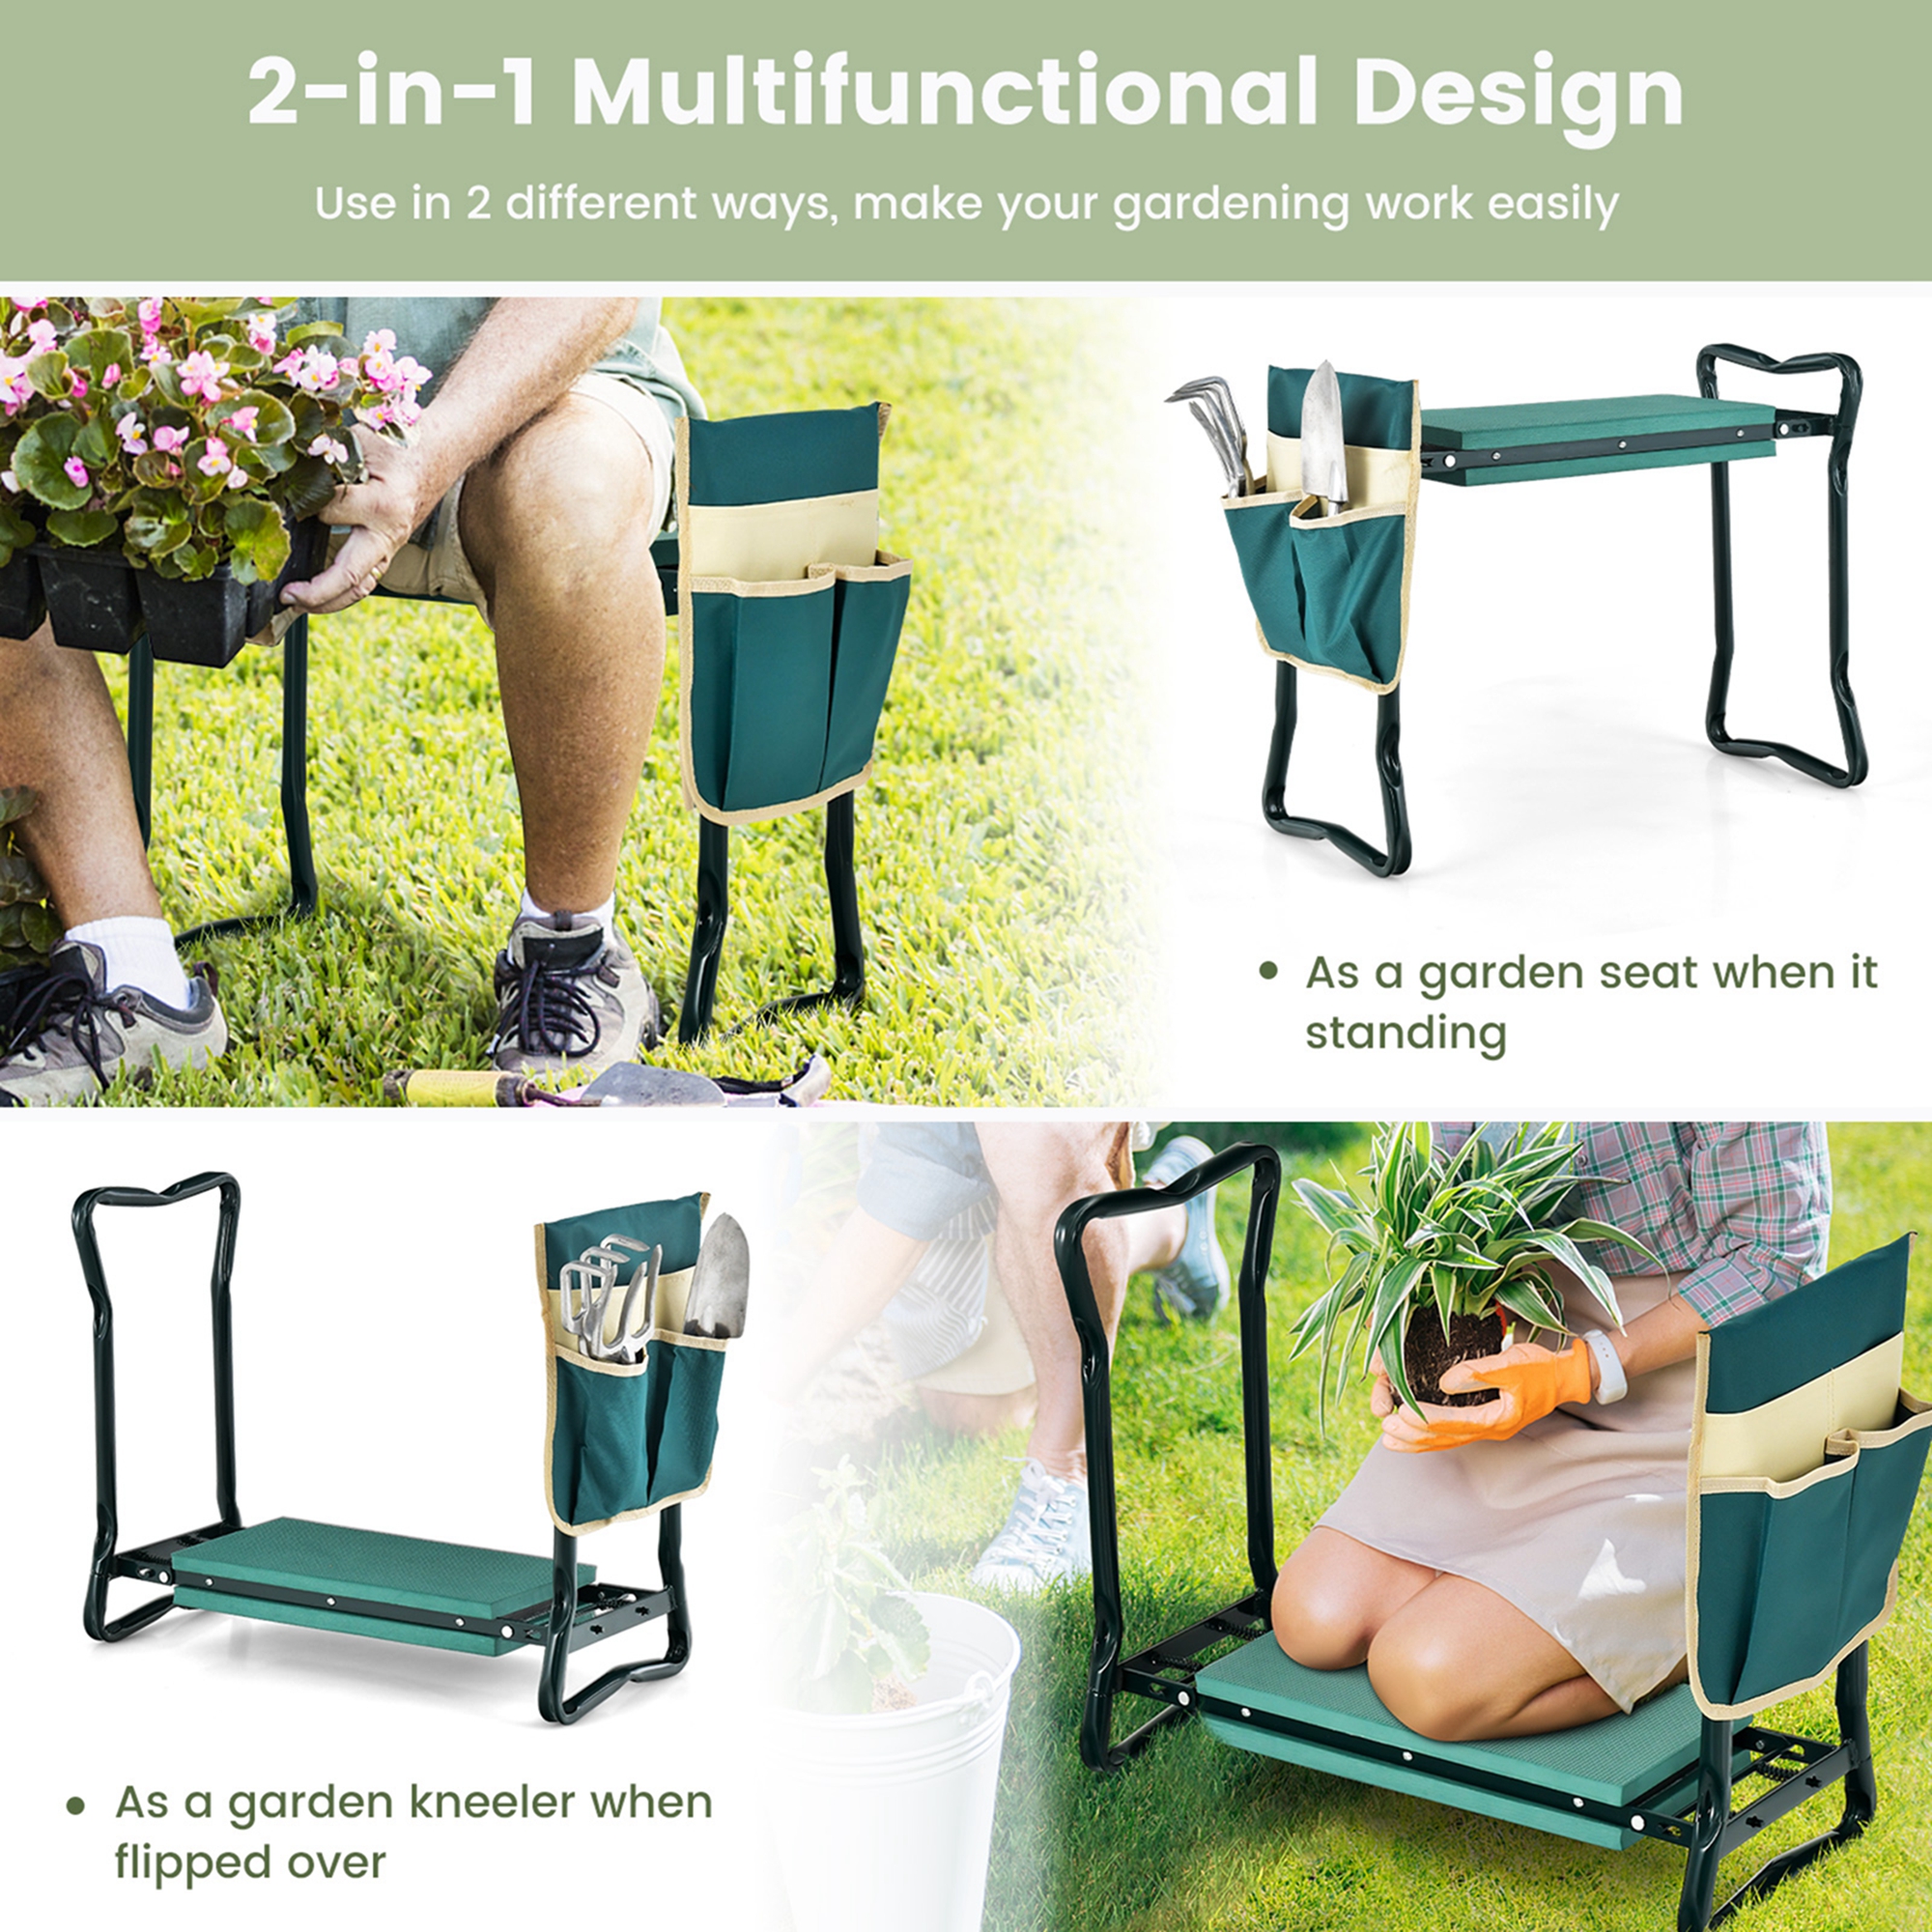
Creating a garden kneeling pad involves simple materials like foam and fabric. Cut the foam to size, cover it with durable fabric, and secure it with strong adhesive or stitches. This DIY project offers comfort and protection for your knees while gardening. For those interested in expanding their gardening toolkit, learning how to build a garden kneeler can be an excellent next step. This multifunctional item not only serves as a kneeling pad but can also be flipped over to provide a sturdy seat while you work. It enhances your gardening experience by reducing strain on your knees and back, allowing you to focus on what you love most—tending to your plants.
Designing your own garden kneeling pad can be a fun and rewarding project. A well-thought-out design ensures comfort, functionality, and a personal touch. With a few considerations, you can create a pad that's perfect for your gardening needs.
Size And Shape Considerations
The size of your kneeling pad is important for comfort. A larger pad offers more space to move around while working. Measure the area where you'll use it most. Consider your body size and the space available in your garden. Shapes can vary from rectangles to more ergonomic designs. Rectangular pads are simple and effective. Ergonomic shapes can provide extra support for knees. Choose a shape that suits your comfort and style.
Adding Personal Touches
Personal touches make your kneeling pad unique. Choose fabrics that reflect your style and personality. Bright colors or floral patterns add a cheerful touch. Add a monogram or embroidery for a personalized element. Consider using waterproof fabric for durability. Decorate with patches or appliqués for a fun look. Personal touches make your pad stand out and feel special.
Functional Features
Incorporating functional features enhances the usefulness of your kneeling pad. Add a handle for easy carrying. Consider a foldable design for compact storage. Use foam padding for extra comfort and support. Ensure the materials are easy to clean after use. Non-slip backing can prevent accidents on wet surfaces. These features make your gardening experience more enjoyable.
Cutting And Shaping Foam
Creating a garden kneeling pad involves cutting and shaping foam for comfort. Use a sharp knife to carve foam into a rectangle, ensuring smooth edges. Cover with fabric for durability and ease of cleaning.
Creating a garden kneeling pad is a rewarding project that combines practicality with personal touch. One of the most crucial steps in this DIY journey is cutting and shaping the foam. This step ensures your kneeling pad provides maximum comfort and support while gardening. Here's how you can achieve the perfect shape and size for your kneeling pad.
Measurement Techniques
To begin, measure the space you want to cover when kneeling. A good rule of thumb is to ensure the pad is wide enough to accommodate your knees with some extra room for movement. Consider using a measuring tape to get the exact dimensions. Once you have the measurements, transfer them onto the foam with a marker. It's always better to start slightly larger, allowing room for adjustments.
Tools For Cutting
Selecting the right tools is essential for clean cuts. A sharp utility knife or electric carving knife works wonders on foam. These tools allow for precision and ease, making the task less daunting. Ensure you have a flat, sturdy surface to work on. A cutting mat can help protect your surfaces and provide stability.
Ensuring Comfort And Support
Think about the thickness of the foam. A thicker pad offers more comfort, especially for prolonged gardening sessions. Test the foam by pressing down on it with your hands to gauge support. Consider layering different foam densities for a custom feel. This approach can provide a firm base with a softer top layer, optimizing both comfort and support. Isn't it satisfying to know that a few simple techniques can transform a piece of foam into a vital gardening tool? With these tips, you can ensure your homemade kneeling pad is both functional and comfortable. What's your favorite DIY garden project? Share your thoughts below!
Sewing The Fabric Cover
Sew the fabric cover by stitching the edges of your chosen material. Ensure the seams are tight for durability. Use a sewing machine for a neat finish, creating a protective layer for your garden kneeling pad.
Sewing the fabric cover for your garden kneeling pad is a delightful project that combines creativity with practicality. It's a chance to personalize your gardening gear while ensuring comfort during those long planting sessions. Whether you're an experienced seamstress or a beginner, crafting a sturdy cover can be both simple and satisfying.
Simple Sewing Techniques
Start by selecting a durable fabric that suits your style and gardening needs. Cotton duck or canvas are excellent choices for their resilience. Cut the fabric into two pieces, each slightly larger than the foam insert of your kneeling pad. This ensures you have enough material for seams and a snug fit. Use basic straight stitching to sew three sides of the fabric pieces together, leaving one side open to insert the foam. This simple technique ensures a clean, professional look without requiring advanced sewing skills.
Creating A Durable Cover
Opt for strong thread to withstand frequent use and exposure to the elements. Polyester or nylon threads are ideal for outdoor projects. Reinforce the seams by double-stitching. This additional line of stitching can greatly increase the longevity of your cover, preventing wear and tear. Consider adding a waterproof lining to protect the foam from moisture. This could be a lifesaver during unexpected rain showers while you're gardening.
Incorporating Fasteners
Think about how you want to secure the open side of your cover. Velcro strips are easy to sew and adjust, making them a practical choice. If you're looking for a more polished finish, sew a zipper along the open edge. It provides a snug closure and enhances the overall appearance of your pad. Snap buttons are another option, offering a classic look and easy access. Ensure they're evenly spaced for a neat finish. Are you ready to transform a simple piece of fabric into a functional garden accessory? By focusing on these key elements, you can create a kneeling pad cover that is both beautiful and durable. Happy sewing!
Assembling The Kneeling Pad
Gather foam pieces and fabric for your garden kneeling pad. Align and sew fabric around foam for comfort. Ensure edges are secure and trim excess material neatly.
Assembling the kneeling pad is a straightforward process that can transform your gardening experience. With just a few materials and a little time, you'll create a comfortable and durable cushion for your knees. This project is perfect for both beginners and seasoned DIY enthusiasts looking to add a personal touch to their gardening toolkit.
Securing Foam In Place
Start by selecting a piece of high-density foam. It's essential for providing the support your knees need. Cut the foam to your desired size, ensuring it fits comfortably under your knees. Use a strong adhesive or spray glue to secure the foam to a sturdy base, like a piece of plywood or a thick plastic sheet. This prevents the foam from shifting as you use the pad. Press the foam firmly onto the base, making sure it sticks evenly. Allow it to dry for a few hours before moving to the next step.
Attaching Fabric Cover
Choose a durable, water-resistant fabric to cover the foam. This not only adds comfort but also protects the foam from dirt and moisture. Cut the fabric a few inches larger than the foam and base, allowing enough material to wrap around the edges. Place the fabric face down, then position the foam and base on top. Wrap the fabric over the foam and base, securing it with a staple gun or heavy-duty sewing. Pull the fabric taut to avoid wrinkles and ensure a snug fit.
Final Adjustments
Check the pad for any loose areas or uneven fabric. Make adjustments by tightening the fabric or adding more staples where necessary. Consider adding a handle for easy transport. A simple strip of fabric or an old belt can be stapled to the sides. Test the pad by kneeling on it. If it feels comfortable and secure, you’ve successfully created a kneeling pad that’s ready for use in your garden. As you enjoy your new garden kneeling pad, think about how small DIY projects can make your gardening more enjoyable. What other tools could you customize to suit your gardening needs?
Maintenance Tips
Creating a garden kneeling pad involves using durable foam and waterproof fabric. Cut foam to the desired size and cover it with fabric for comfort. Secure the fabric with adhesive or stitching, ensuring it's tight and smooth. This simple project provides support and keeps knees clean while gardening.
Maintaining your garden kneeling pad ensures it stays comfortable and durable. Regular care can make it last longer and keep it looking new. Follow these simple tips to keep your kneeling pad in great shape.
Cleaning And Care
A clean pad is essential for your garden activities. Use mild soap and water to wipe away dirt after each use. Avoid harsh chemicals that can damage the material. Dry it thoroughly to prevent mold and mildew growth. Regular cleaning keeps it fresh and ready for use.
Storage Solutions
Proper storage helps maintain the pad's condition. Store it in a dry, cool place away from direct sunlight. Hanging or placing it flat can prevent bending or creasing. A dedicated storage space can protect it from dust and dirt.
Extending Lifespan
Prevent wear and tear with gentle use. Avoid leaving the pad on rough surfaces for long periods. Rotate its use to minimize stress on certain areas. Inspect for any signs of damage and repair promptly. These habits ensure your kneeling pad lasts longer.
Troubleshooting Common Issues
Creating a garden kneeling pad is a rewarding DIY project. Yet, occasional issues might arise. Addressing these problems ensures your pad remains comfortable and durable. Let's explore how to troubleshoot common issues effectively.
Fixing Fabric Tears
Fabric tears can ruin the look of your kneeling pad. To fix them, start by cleaning the torn area. Use a needle and thread that match the fabric color. Sew the tear neatly, ensuring stitches are tight. If the tear is large, consider using a patch. Cut a piece of matching fabric slightly larger than the tear. Sew it over the damaged area for a seamless repair.
Resolving Foam Deformation
Foam deformation can affect comfort. To resolve this, reshape the foam by applying gentle pressure. Lay the foam flat and press evenly across its surface. If deformation persists, consider replacing the foam. Choose high-density foam for better durability and support. Regularly check for signs of wear to prevent future issues.
Improving Cushioning
Insufficient cushioning can make gardening uncomfortable. Enhance cushioning by adding an extra foam layer. Cut foam to fit the pad's dimensions. Secure it in place with adhesive spray or fabric glue. Ensure the foam is evenly distributed. For added comfort, use memory foam. It contours to your knees, reducing pressure points during long gardening sessions.
Credit: nutsrvph.com
Frequently Asked Questions
What Are Garden Kneeling Pads Made Of?
Garden kneeling pads are typically made of durable foam or gel materials. These materials provide cushioning and support, reducing stress on knees. Some pads have a waterproof outer layer for protection against moisture. High-quality pads often feature ergonomic designs for enhanced comfort during gardening activities.
How To Garden When You Can't Kneel?
Use raised garden beds for easy access. Utilize long-handled tools to avoid bending. Consider vertical gardening on walls or trellises. Employ a garden stool or chair for comfort. Try container gardening for flexibility and convenience.
What's The Best Garden Kneeler?
The best garden kneeler is the TomCare Garden Kneeler. It offers comfort, durability, and versatility with its foldable design. It features sturdy handles, a comfortable foam cushion, and can be flipped to use as a seat. This kneeler is ideal for reducing strain during gardening tasks.
Are Knee Pads Good For Gardening?
Yes, knee pads protect knees from strain and discomfort during gardening. They provide cushioning and support, reducing pain. Ideal for kneeling tasks, they enhance comfort and prevent injury. Durable materials ensure long-lasting use. Opt for adjustable straps for a secure fit.
Essential for avid gardeners to maintain knee health.
Conclusion
Creating your own garden kneeling pad is practical and easy. Enjoy comfortable gardening with your handmade pad. Save money while protecting your knees. Personalize it to match your style. Use materials you have at home. Simple steps lead to great results.
Start crafting your pad today. Share your creation with friends. Inspire others to make their own. Have fun in the process and enjoy gardening more. Happy gardening!