Have you ever noticed your lawn mower isn't cutting as smoothly as it once did? Perhaps the grass looks ragged and uneven after a mow, or your mower seems to struggle more than usual.
These are telltale signs that your lawn mower blade may be dull or damaged. Replacing a lawn mower blade is a simple task that can breathe new life into your trusty machine, making your mowing efforts quicker and more efficient.
Imagine the satisfaction of seeing your lawn perfectly trimmed and even, every blade of grass cut with precision. It's easier than you think to achieve that professional-looking lawn without the expense of hiring a service. By learning how to replace your lawn mower blade, you can take control of your lawn's appearance and save money at the same time. Keep reading to discover the easy steps to replace your lawn mower blade and transform your mowing experience.

Credit: www.youtube.com
Safety Precautions
Disconnect the spark plug wire to prevent accidental starts. Wear protective gloves to avoid injuries from sharp blades. Secure the mower to prevent movement while changing the blade.
Replacing a lawn mower blade requires careful attention to safety. Ensuring your safety is vital to avoid accidents. Before starting, gather the necessary tools and safety gear. Proper preparation can prevent injuries during the blade replacement process.
Check The Lawn Mower's Manual
Read the mower's manual for specific safety instructions. Each model might have unique guidelines.
Disconnect The Spark Plug
Disconnect the spark plug to avoid accidental starts. This simple step can prevent serious injuries.
Wear Protective Gear
Protective gear is essential. Wear gloves and goggles to shield your hands and eyes.
Stabilize The Mower
Ensure the mower is on a flat surface. Use wedges or blocks to stabilize it securely.
Use The Right Tools
The correct tools make the job safer. Use a wrench that fits the blade bolt perfectly.
Handle The Blade With Care
Blades are sharp. Handle them carefully to avoid cuts or injuries.
Inspect The New Blade
Check the new blade for defects before installation. A damaged blade can cause accidents.
Follow Proper Installation Steps
Ensure the blade is properly aligned. Tighten the bolt securely to keep it in place.
Reconnect The Spark Plug
After installation, reconnect the spark plug. This prepares the mower for safe operation.
Credit: www.searspartsdirect.com
Tools Required
Tools such as a wrench, a block of wood, and gloves are necessary. A socket wrench set and a sturdy workbench will also be helpful for safely replacing the lawn mower blade.
Replacing a lawn mower blade requires the right tools for safety and efficiency. Using the correct tools ensures a smooth and quick process. Here is a list of essential tools you'll need.
Socket Wrench Set
A socket wrench set is crucial for removing the bolt. Choose the correct size to avoid stripping the bolt. It's a versatile tool for various sizes.
Blade Removal Tool Or Block Of Wood
This tool holds the blade in place while you work. A block of wood also works to prevent the blade from moving.
Work Gloves
Protect your hands from sharp edges with sturdy work gloves. They provide a better grip and safety.
Safety Goggles
Wear safety goggles to protect your eyes from debris. Safety first is always key.
Cleaning Brush Or Wire Brush
A cleaning brush helps remove dirt and rust. It ensures a clean surface for the new blade.
Torque Wrench
Use a torque wrench to tighten the bolt to the correct tension. This prevents accidents and ensures the blade is secure.
Penetrating Oil
Use penetrating oil for bolts that are hard to remove. It loosens rusted or stuck bolts easily.
Replacement Blade
Choose the correct replacement blade for your mower model. Ensure it is sharp and ready for installation. Having these tools ready makes replacing the mower blade easier. Safety and precision are key for this task.
Preparing The Mower
Begin by disconnecting the spark plug to ensure safety. Carefully tilt the mower to access the blade. Secure the mower to prevent movement while you work.
Replacing a lawn mower blade is a task anyone can tackle. Before diving into the replacement process, preparation is key. Proper preparation ensures safety and efficiency. Let's explore how to get your mower ready for a blade change.
Disconnecting Power
Always prioritize safety. Disconnect the spark plug wire first. This prevents accidental starts. For electric mowers, unplug the power cord. If you have a battery-powered mower, remove the battery. These steps ensure your safety throughout the process.
Cleaning The Mower Deck
A clean deck makes the job easier. Use a brush to remove grass clippings. A putty knife works for stubborn debris. This gives you a clear view of the blade area. A clean deck also prevents rust and damage. Always wear gloves to protect your hands.

Credit: www.youtube.com
Removing The Old Blade
Ensure the lawn mower is turned off before removing the old blade. Use a wrench to loosen the blade bolt, then slide the blade off carefully. Remember to wear gloves for safety and check the blade for any damage before replacement.
Removing the old blade from your lawn mower can seem daunting, but it's a straightforward process with the right approach. The key is to ensure safety while you work, and to have the right tools on hand. Let’s walk through the essential steps to get your mower ready for a new blade.
Positioning The Mower
Before diving in, you need to position your mower safely. Start by disconnecting the spark plug wire to prevent any accidental starts. Then, tilt the mower to its side, ensuring the carburetor and air filter face upwards to prevent leaks. When I first attempted this task, I remembered the frustration of oil spilling everywhere because I positioned it incorrectly. Learn from my mistake and keep those parts facing up!
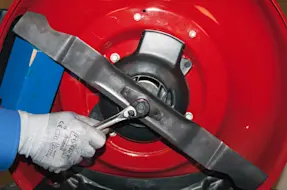
Loosening Blade Bolts
With the mower securely positioned, focus on the blade bolts. Use a wrench to loosen them. If they're stubborn, a bit of penetrating oil can help. Remember to wear gloves to protect your hands from sharp edges. Once, I spent ages trying to loosen a rusted bolt. A handy tip is to use a piece of pipe over the wrench for extra leverage—just like a power boost for your arm! How do you handle bolts that seem impossible to budge? Share your best tips and tricks below. The community might have solutions you haven't thought of yet!
Inspecting The Blade
Inspecting the blade is a crucial step before replacing it, ensuring your lawn mower functions efficiently and safely. A well-maintained blade not only gives your lawn a neat finish but also extends the mower's lifespan. Let's dive into how you can effectively inspect your mower's blade.
Checking For Damage
Start by carefully examining the blade for visible damage. Look for cracks, bends, or excessive wear. These can greatly affect performance and might be dangerous during operation. If you notice a crack, it's time for a replacement as this can lead to uneven cutting or even blade breakage.
Remember when you accidentally hit a rock or a branch while mowing? Such incidents often cause blade damage. Inspecting your blade after these occurrences helps avoid potential hazards. Always ensure your mower is off and disconnected from the power source before handling the blade.
Assessing Blade Sharpness
A sharp blade is essential for a clean cut, which promotes healthier grass growth. Run your fingers (carefully!) along the edge to feel if it’s blunt or sharp. A dull blade rips grass rather than cutting it, leading to a ragged lawn appearance.
Think about the last time your lawn looked uneven or had patches of uncut grass. This could be a sign of a dull blade. You might consider sharpening it if the edge feels rough or rounded. However, if sharpening doesn’t improve performance, it’s time to replace it.
Isn't it surprising how a simple task like blade inspection can save you time and ensure your lawn looks its best? Regular checks can prevent long-term issues and keep your mowing sessions smooth and effective. Are you ready to give your lawn the care it deserves?
Choosing A New Blade
Choosing a new blade for your lawn mower can be an exciting yet daunting task. With various options available, you might wonder which blade is the best fit for your machine. The perfect blade can improve your mower's efficiency and the overall appearance of your lawn.
Identifying Compatible Blades
Start by checking your lawn mower’s manual. It usually lists compatible blade types and specifications. If you've misplaced the manual, the manufacturer's website is a reliable resource.
Consider the blade's size and mounting hole configuration. These elements need to match your mower's requirements for seamless installation. Incorrect sizing can lead to reduced performance or damage.
Selecting Blade Type
Now, think about the cutting results you desire. Different blades offer varied cutting effects. For example, a high-lift blade is perfect for creating a manicured look due to its powerful suction.
Mulching blades are an excellent choice if you prefer natural fertilization. They chop grass clippings finely, returning nutrients to the soil. Conversely, standard blades are versatile and suit most mowing needs.
Have you ever considered how the blade type affects your mowing experience? The right blade can reduce your workload while enhancing lawn health.
- High-lift blades:Ideal for bagging and a clean finish.
- Mulching blades:Efficient for eco-friendly lawn maintenance.
- Standard blades:Great for everyday use.
Assess your lawn's needs and choose a blade that aligns with your mowing habits. This decision is crucial for maintaining both your mower's performance and your lawn's appearance.
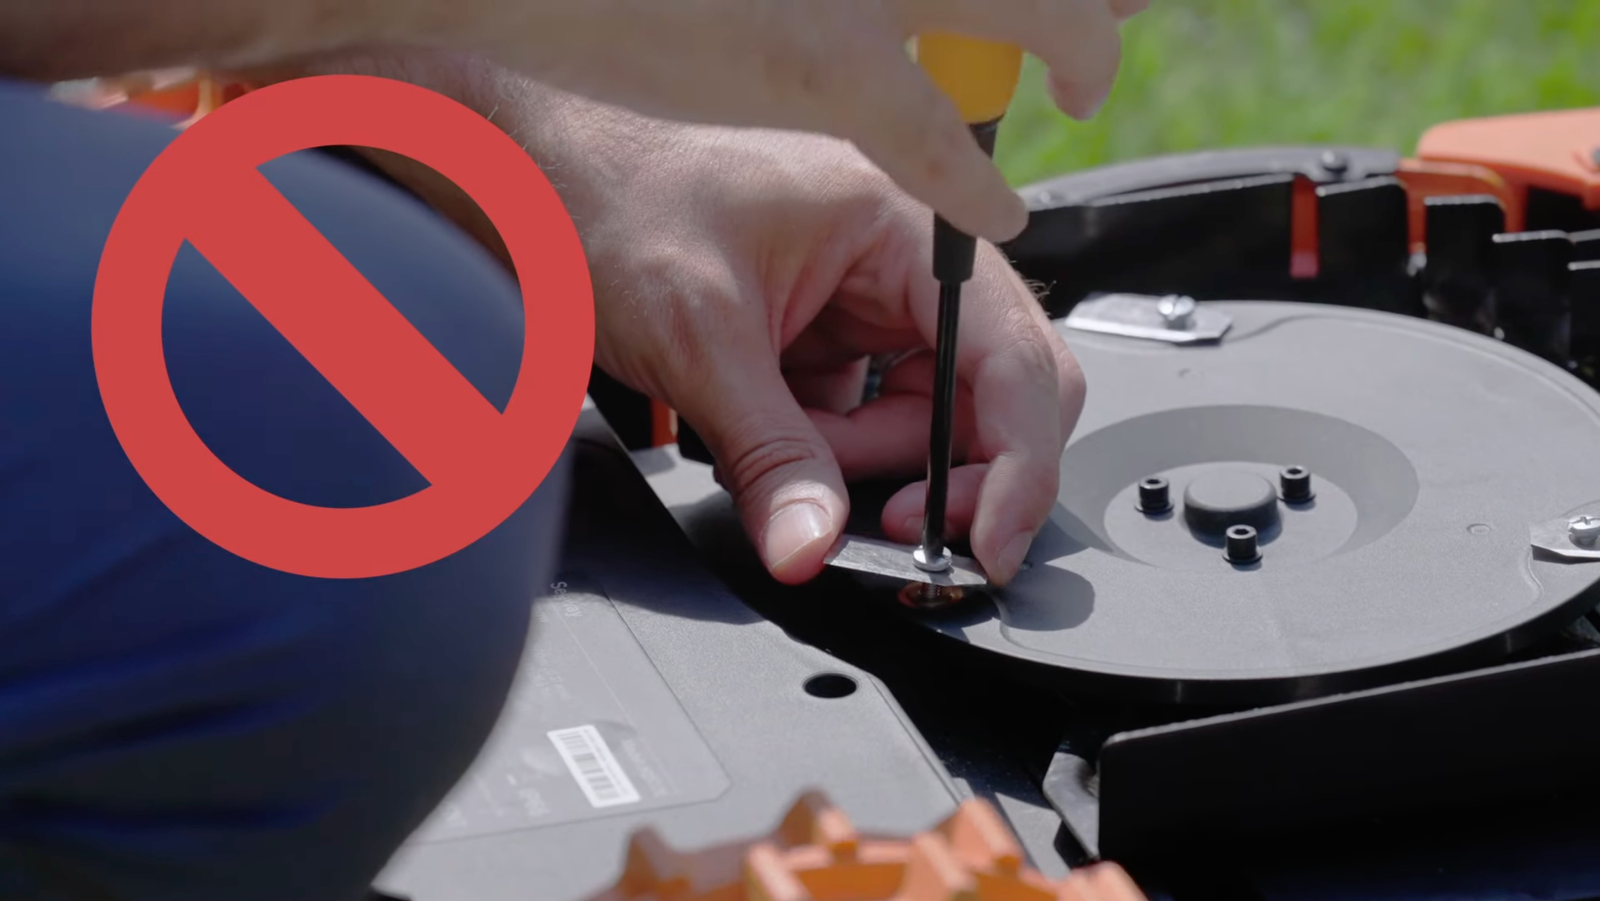
Installing The New Blade
Installing the New Blade Ensure the lawn mower is off and disconnected. Use a wrench to remove the old blade carefully. Align the new blade properly and secure it tightly. Check for balance and ensure the blade is installed correctly before use.
Installing the new blade on your lawn mower is a straightforward task. First, ensure the lawn mower is off and unplugged for safety. Gather necessary tools, like a wrench and gloves, to make the process smooth. Installing a new blade enhances cutting efficiency and reduces mower strain.
Aligning The Blade
Place the new blade onto the spindle. Ensure the cutting edge faces the right direction. Most blades have a label indicating which side should face down. Align the center hole of the blade with the spindle. This alignment is crucial for balanced rotation. Double-check that the blade sits flat against the spindle.
Securing Blade Bolts
Insert the bolts through the blade and into the spindle holes. Hand-tighten them to keep the blade in place. Use a wrench to secure the bolts firmly. Tighten them in a crisscross pattern for even pressure. Avoid over-tightening to prevent damage. Ensure the blade is stable and does not wobble. Check the bolts after a few uses to ensure they remain tight.
Checking Blade Installation
Ensure the lawn mower is turned off and unplugged. Check the blade for tightness and proper alignment before installation. Confirm all bolts are securely fastened to prevent wobbling or damage during operation.
Checking blade installation is crucial after replacing your lawn mower blade. Correct installation ensures safety and performance. A securely attached blade cuts grass smoothly, reducing wear and tear. Incorrect installation can cause vibrations or damage. Follow these steps to confirm your blade is properly installed.
Ensuring Proper Attachment
Check the blade is tightly fastened. Use a wrench to tighten the bolt. The blade should not wobble. If it moves, it can cause accidents. Make sure the blade aligns correctly with the mower deck. This prevents uneven cutting. Double-check the attachment points. They should be free of debris or rust.
Testing Blade Balance
A balanced blade is essential for smooth operation. Unbalanced blades cause vibrations. They can damage the mower. To test balance, remove the blade. Place it on a balance tool. The blade should stay level. If it tilts, it needs adjustment. Sharpen or grind the heavier side. Retest until balanced. A balanced blade extends mower life. It also enhances cutting efficiency.
Final Maintenance Tips
Final Maintenance Tips Ensure safety by disconnecting the spark plug. Secure the mower and use a wrench to remove the blade bolt.
Replacing a lawn mower blade is just the start. Final maintenance tips ensure your mower's long life and efficiency. Simple tasks can make a big difference. Follow these tips to keep your mower in top shape.
Regular Cleaning
A clean mower works better. Grass clippings can clog parts. Remove them after each use. Use a brush or compressed air. Focus on the mower deck and blade. Clean under the deck regularly. This prevents rust and helps the blade cut cleanly.
Routine Blade Checks
Check the blade often. Look for nicks or dull edges. A sharp blade cuts grass evenly. Inspect the blade for balance. An unbalanced blade causes vibrations. Replace it if it's damaged or bent. Regular checks prevent unexpected problems.
Frequently Asked Questions
Is It Hard To Replace A Lawn Mower Blade?
Replacing a lawn mower blade is typically straightforward. Ensure you unplug the spark plug first. Use a wrench to remove the bolt securing the blade. Attach the new blade, tighten securely, and reattach the spark plug. Follow safety precautions, and consult the manual for specific instructions.
Which Way Do You Turn The Bolt To Remove A Lawn Mower Blade?
Turn the bolt counterclockwise to remove a lawn mower blade. Use a wrench for better grip and leverage. Secure the blade with a block of wood to prevent rotation during removal. Ensure safety by wearing gloves and disconnecting the spark plug before starting the process.
Is A Lawn Mower Blade Nut Reverse Thread?
Yes, a lawn mower blade nut is often reverse threaded. This design prevents loosening during operation. Check your mower's manual for specific instructions. Always use appropriate tools and safety measures when adjusting or replacing the blade.
Is It Better To Sharpen A Lawn Mower Blade Or Buy A New One?
Sharpening a lawn mower blade is cost-effective and extends its life. Buy a new blade if it's severely damaged or worn out. Regular sharpening ensures optimal performance, reduces strain on the engine, and maintains a healthy lawn. Consider professional sharpening for best results.
Conclusion
Replacing a lawn mower blade is simple. Gather your tools first. Disconnect the spark plug for safety. Remove the old blade carefully. Install the new one securely. Tighten the bolts properly. Check balance for smooth cutting. Regular maintenance keeps your mower efficient.
Remember to clean after each use. Store it safely to prevent rust. A sharp blade ensures a healthy lawn. Follow these steps and enjoy a neat yard. It's a satisfying task. Keep your lawn looking great. Your mower will thank you!