Have you ever looked at your lawn mower and thought, “How do I even take off the blade?” You’re not alone.
Many homeowners feel a bit daunted by the idea of handling this task. But what if I told you it’s simpler than you think? With the right guidance, you can easily remove your lawn mower blade and ensure your machine runs smoothly.
Imagine the satisfaction of knowing you’re taking care of your equipment and ensuring a pristine lawn. You’ll discover step-by-step instructions that make the process straightforward and stress-free. Get ready to unlock the secrets to a well-maintained lawn mower and enjoy a greener, more vibrant lawn. Keep reading to become confident in your lawn mower maintenance skills!
Credit: www.searspartsdirect.com
Tools Needed
Taking off a lawn mower blade might sound like a daunting task, but with the right tools, it’s a straightforward process. Knowing what you need before starting can save you time and prevent frustration. You don’t need a toolbox full of fancy equipment; just a few essential tools that are likely already in your garage.
Before you start, gather all the necessary tools. This ensures a smooth process without unnecessary interruptions. Here’s a handy list of what you’ll need:
- Socket Wrench:This is crucial for removing the bolt that holds the blade in place. Ensure you have the correct size; most lawn mowers use a standard size.
- Gloves:Your safety comes first. Wearing gloves will protect your hands from sharp edges and any debris.
- Block of Wood:A simple piece of wood can be used to prevent the blade from rotating while you’re loosening the bolt.
- Penetrating Oil:If the bolt is rusty or stuck, a few drops of penetrating oil can make it easier to remove.
- Safety Goggles:Eye protection is often overlooked but is essential, especially when dealing with rust and dirt.
With these tools at hand, the task becomes much simpler. Imagine the satisfaction of accomplishing this on your own, knowing you have the skills and the tools to tackle it. Have you ever thought about how a small block of wood could be your best ally in this process? Small details like this can turn a challenging job into a manageable task. Next time you face a similar situation, remember that preparation is half the battle.

Credit: www.vonhaus.com
Safety Precautions
Ensure the mower is off and unplugged before starting. Wear gloves and safety goggles to protect your hands and eyes. Secure the mower to prevent movement while you work.
Ensuring safety is crucial when removing a lawn mower blade. A lawn mower has sharp parts that can be dangerous. Follow safety precautions to avoid accidents and injuries. This guide will help you understand important steps for safety.Turn Off The Mower
Ensure the mower is completely off. Disconnect the spark plug to prevent accidental starts. This step is vital for safety. It ensures no power flows to the mower.Wear Protective Gear
Use gloves to protect your hands from sharp edges. Eye protection is also recommended to prevent debris from entering your eyes. Safety gear minimizes risk when working with blades.Secure The Mower
Place the mower on a flat surface. Use blocks or a stand to stabilize it. This prevents the mower from tipping over during blade removal.Use Proper Tools
Ensure you have the right tools for the job. Use a wrench that fits the blade bolts. Proper tools make the process safer and easier.Check The Blade Position
Observe how the blade is positioned before removal. This helps when reattaching the blade later. Knowing the correct position is essential for safety and functionality.Keep Parts Organized
Place removed bolts and washers in a safe spot. Keeping parts organized prevents loss and ensures easy reassembly. It also helps maintain safety by avoiding misplaced components.Inspect The Blade
Once removed, inspect the blade for damage. Look for cracks or wear. A damaged blade can be unsafe and should be replaced.Preparing The Mower
Remove the spark plug to ensure safety. Tip the mower on its side, ensuring the air filter is up. Use a wrench to loosen the blade bolt.
Taking off a lawn mower blade might seem daunting, but with the right preparation, it’s a straightforward task. Before diving into the actual removal, setting the stage for success is crucial. A well-prepared mower ensures safety and efficiency. Let’s look at some vital steps to get your mower ready for blade removal.Disconnecting The Spark Plug
Safety first! Before anything else, disconnecting the spark plug is essential to prevent accidental starts. Imagine the surprise—and danger—of the mower coming to life while you’re working on it. To disconnect, locate the spark plug wire, usually found at the front or side of the engine. Gently pull it away from the spark plug. You might need a firm grip, but be careful not to tug too hard. This simple step keeps you safe and your mower inactive.Positioning The Mower
Proper positioning of the mower makes blade removal much easier. You want the mower to be stable and accessible. How do you achieve this? First, ensure the mower is on a flat surface; uneven ground can lead to instability. Then, using a piece of wood or a jack stand, lift one side of the mower slightly. This elevation grants you easy access to the blade. Consider this: would you rather struggle reaching under a flat mower or have the blade right in front of you? Elevating the mower not only provides better visibility but also prevents unnecessary strain on your back. Taking these preparatory steps seriously can transform the blade removal process from challenging to simple. So, how ready is your mower today?Removing The Blade
Removing the Blade Detach the spark plug for safety, then use a wrench to loosen the bolt holding the blade. Carefully slide the blade off the mower, ensuring you note its original position for reassembly.
Removing the blade from your lawn mower is a crucial maintenance task that ensures your machine runs efficiently and safely. Whether you’re sharpening the blade or replacing it, knowing how to remove it properly is essential. Let’s break down the process into manageable steps.Securing The Mower
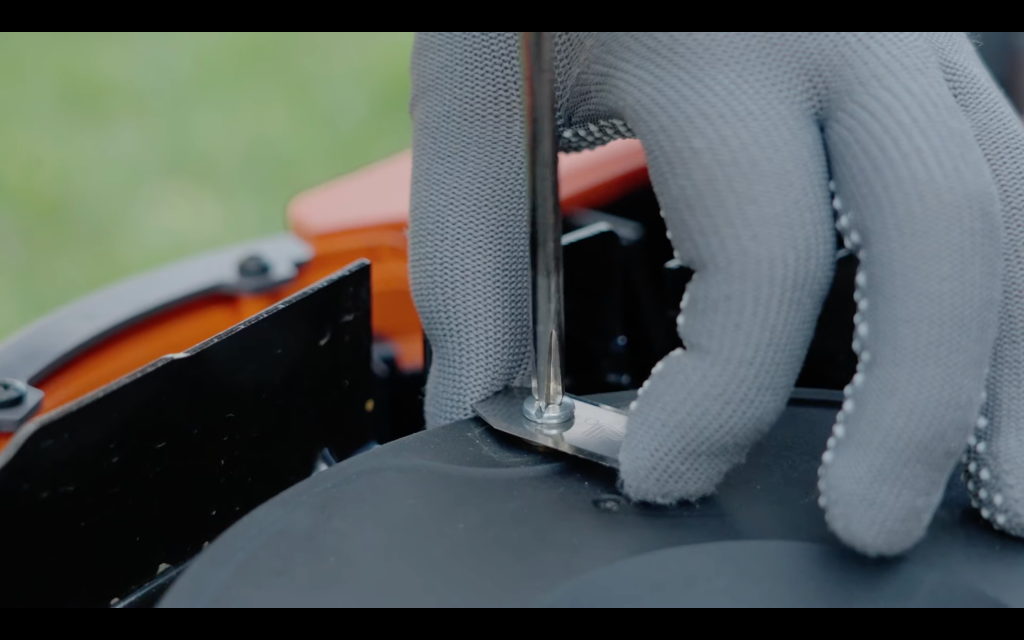
Before you get started, safety should be your top priority. Begin by disconnecting the spark plug to prevent any accidental starts. Once that’s done, tilt the mower on its side, ensuring the air filter and carburetor face upwards to avoid oil leakage. Secure the mower in place with a block or a stand to keep it stable during the process. This not only keeps you safe but also makes the task much easier.Loosening The Blade Bolt
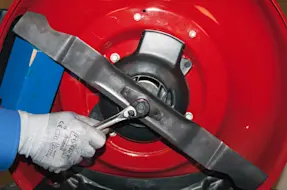
Now, it’s time to focus on the blade bolt. Use a wrench or a socket to grip the bolt tightly. It’s usually a good idea to wear gloves for extra grip and protection. If the bolt is stubborn, a little penetrating oil can work wonders. Let it sit for a few minutes to work its magic. Remember, patience here pays off—forcing a stuck bolt can lead to damaged tools or worse, a ruined blade.Detaching The Blade
With the bolt loosened, you can now detach the blade. Carefully remove it, noting the orientation for when you need to reattach it. A good tip is to take a photo before removal. This small step can save you from the guesswork later on. Store the blade in a safe place if you’re planning on sharpening it. If it’s for replacement, ensure you have the correct new blade ready to install. Isn’t it satisfying to know you can handle this task yourself? With these steps, you’ve not only learned how to safely remove a lawn mower blade, but you’ve also gained a deeper understanding of your machine’s maintenance needs.Inspecting The Blade
Inspecting the Blade Removing a lawn mower blade involves safety first. Disconnect the spark plug to prevent accidental starts. Use a wrench to carefully loosen the bolt holding the blade in place.
Inspecting the blade is essential for a well-maintained lawn mower. After removing the blade, a thorough inspection helps keep your lawn mower efficient and safe. This process involves checking for damage and cleaning the blade, ensuring longevity and optimal performance.Checking For Damage
Look for nicks or dents on the blade’s edge. These imperfections can reduce cutting efficiency. Feel the blade’s surface for any uneven spots. A warped blade might cause vibrations during use. Examine the blade’s center for cracks. Cracks can lead to breakage under stress. If damage is severe, consider replacing the blade.Cleaning The Blade
Use a brush to remove grass and dirt from the blade. A clean blade ensures a smoother cut. Wipe the blade with a damp cloth to remove stubborn debris. This step prevents rust and corrosion. For sticky residue, use a mild detergent. Ensure the blade is completely dry before reinstallation. A clean and dry blade lasts longer.Reattaching The Blade
Reattaching the blade involves first removing it safely. Secure the lawn mower on a flat surface. Use a wrench to loosen the bolt holding the blade. Gently slide the blade off, taking care to avoid sharp edges.
Reattaching the blade to your lawn mower is just as crucial as removing it. Ensuring it’s securely and correctly attached means your lawn mower will operate efficiently and safely. Picture this: you’ve just finished sharpening the blade, and now it’s time to get everything back in place. How do you ensure everything is aligned and secure?Aligning The Blade
Start by placing the blade onto the spindle, making sure the cutting edges are facing the right direction. Look for any alignment guides on the blade or spindle that can help you position it correctly. Remember the orientation it was in when you removed it; this is crucial for effective mowing and ensuring the balance of your mower.Tightening The Blade Bolt
Once aligned, it’s time to secure the blade with the bolt. Use a wrench to tighten the bolt, ensuring it’s snug but not overly tight. A torque wrench can be beneficial here, as it helps apply the right amount of pressure, preventing the bolt from being too loose or too tight. Think about the last time you tried to open a jar too tightly sealed—applying the right torque is similar, just enough to keep it secure without overdoing it. Reattaching the blade properly ensures your safety and the mower’s performance. Have you ever wondered how much time a well-maintained mower could save you on your weekly yard duties? Give your lawn the care it deserves by ensuring every part of your mower is in perfect working condition.Testing The Mower
Remove the spark plug to ensure safety. Use a wrench to loosen the bolt holding the blade. Carefully slide the blade off the mower.
Testing the mower after reinstalling the blade is a crucial step to ensure your hard work pays off with a smoothly running machine. This step helps confirm that the blade is securely attached and that the mower functions as expected. A test run can also help identify any unusual noises or vibrations that might indicate issues.Reconnecting The Spark Plug
Before you begin the test, ensure the spark plug is reconnected. This vital step is often overlooked in the excitement of finishing the blade installation. Carefully attach the spark plug wire back to the spark plug, ensuring a snug fit. Double-checking this connection can prevent potential start-up problems. Think of the spark plug as the heart of your mower—without it, your machine simply won’t start.Performing A Test Run
With everything in place, it’s time to take your mower for a spin. Start the mower on a flat, open area to easily observe its performance. Listen for any rattling or grinding sounds, which might indicate the blade is not properly secured. Take note of how the mower cuts the grass. Is it even and clean? If there are any issues, it’s best to address them now rather than when you’re halfway through mowing your lawn. Always remember, a successful test run is not just about ensuring the mower works; it’s about ensuring it works safely and efficiently. Wouldn’t you want the peace of mind knowing your lawn mower is in top condition?
Credit: www.espares.co.uk
Frequently Asked Questions
Which Way Do You Turn The Bolt To Remove A Lawn Mower Blade?
Turn the bolt counterclockwise to remove a lawn mower blade. Use a wrench for a firm grip. Ensure the mower is off and the spark plug disconnected for safety.
How To Unscrew A Lawn Mower Blade?
Turn off the mower and disconnect the spark plug. Use a wrench to loosen the bolt counterclockwise. Secure the blade with a block to prevent movement. Wear gloves for safety. Check the manual for specific instructions.
Are Lawn Mower Blades Righty Tighty Or Lefty Loosey?
Lawn mower blades usually follow the “righty tighty, lefty loosey” rule. Turn clockwise to tighten and counterclockwise to loosen. Always consult the mower’s manual for confirmation, as some models might differ. Proper maintenance ensures efficient mowing and extends the mower’s lifespan.
Are Lawn Mower Blade Bolts Reverse Thread?
Most lawn mower blade bolts are not reverse threaded. Check your mower’s manual for specific details. Reverse threading prevents accidental loosening. Always use the correct tools to ensure safe blade changes. Regular maintenance keeps your mower efficient.
Conclusion
Removing a lawn mower blade is simple with the right steps. Always ensure safety by wearing gloves. Use the correct tools to loosen the bolt. Remember to keep the mower stable. Mark the blade’s position before removal. This helps during reattachment.
Regular maintenance extends your mower’s life. Clean blades cut better and faster. Now, you’re ready to tackle your lawn care tasks. Enjoy a smoother mowing experience with a well-maintained blade. Stay safe and keep those blades sharp!